Free volunteer event signup
Free Volunteer Signup Page with Roles, Shifts and Attendance
Share one signup page. See who is coming, what they signed up for, and who attended.
Free to publish. No credit card required.
See how it worksSee a two-week schedule in actionAsk a questionLooking for a place to help?Browse volunteer events
Know who’s helping, where to send them, and who came.
What is free: creating and publishing a Standard volunteer event, including roles, shifts, signups, and attendance. No credit card is required. Reading the public page is open to everyone; volunteers need a verified account to confirm a place.
If you’re collecting signups in a form and keeping a separate sign-in sheet, this guide shows how to do both in Proximatic. Add jobs and shifts to a free Standard event, share its public page, and use the roster to welcome people and record attendance.
If the event has many repeating shifts, continue with the volunteer shift scheduling guide or see the two-week food pantry example.
Starting with a specific event? Read the food pantry volunteer signup example or the community cleanup volunteer signup example.
Comparing signup tools? Use the one-shift comparison checklist before you switch.
Need to assign people, not just collect signups?
Keep self-selected slots for open roles. For a centrally assigned roster, add approved people and availability, then use supported scheduling rules. AI setup prepares a plan for review and application; a successful direct Auto-Schedule run replaces saved assignments immediately.
Direct Auto-Schedule is free. AI planning has separate pricing by AI-managed event.
Step by step
From planning the event to recording volunteer hours.
Here’s what the coordinator and the volunteer each see, from the first draft to the final attendance record.
01 · Plan
Create and publish the event
Start with where to meet, what needs doing, and how many people you need for each job.
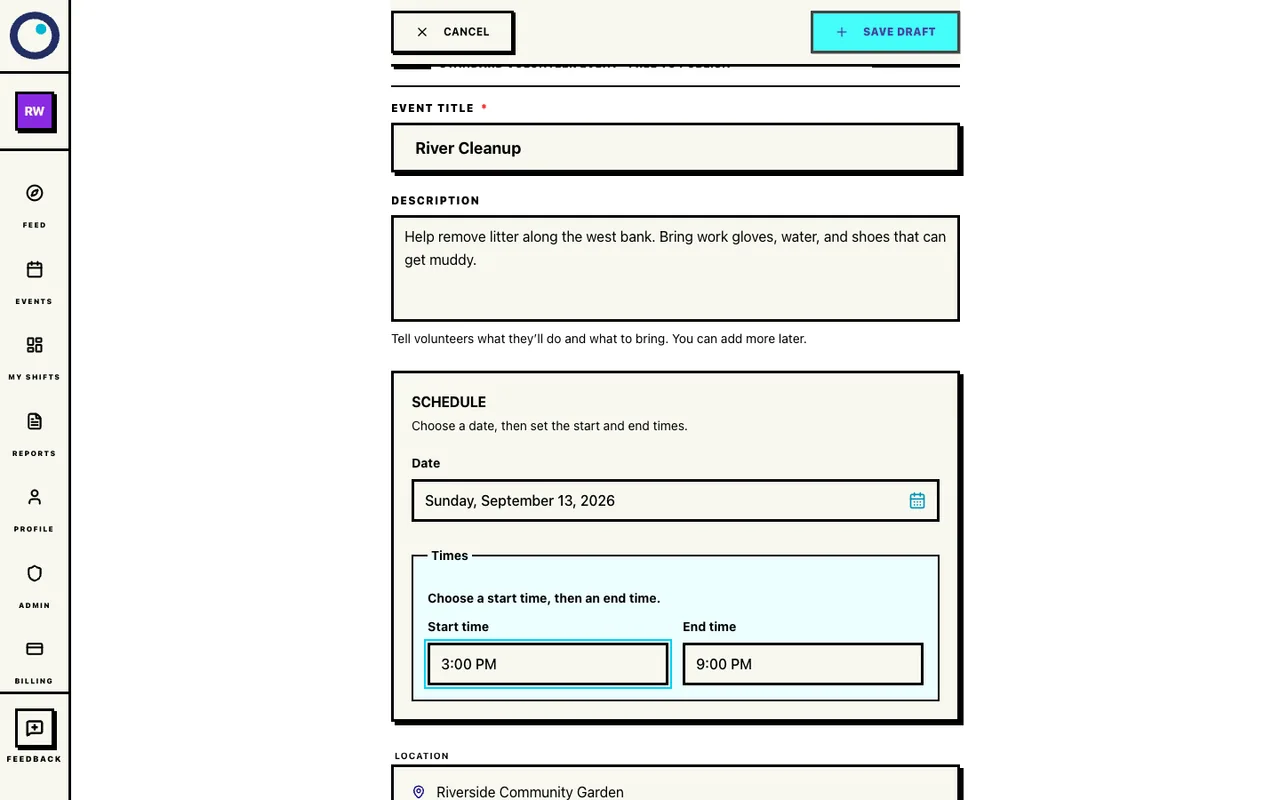
Create an organization or choose the one you coordinate, then create a Standard event. Enter the name, date, meeting place, and a description of the work. Save a draft while you finish the details.
The event stays private until you publish it.
Create your event
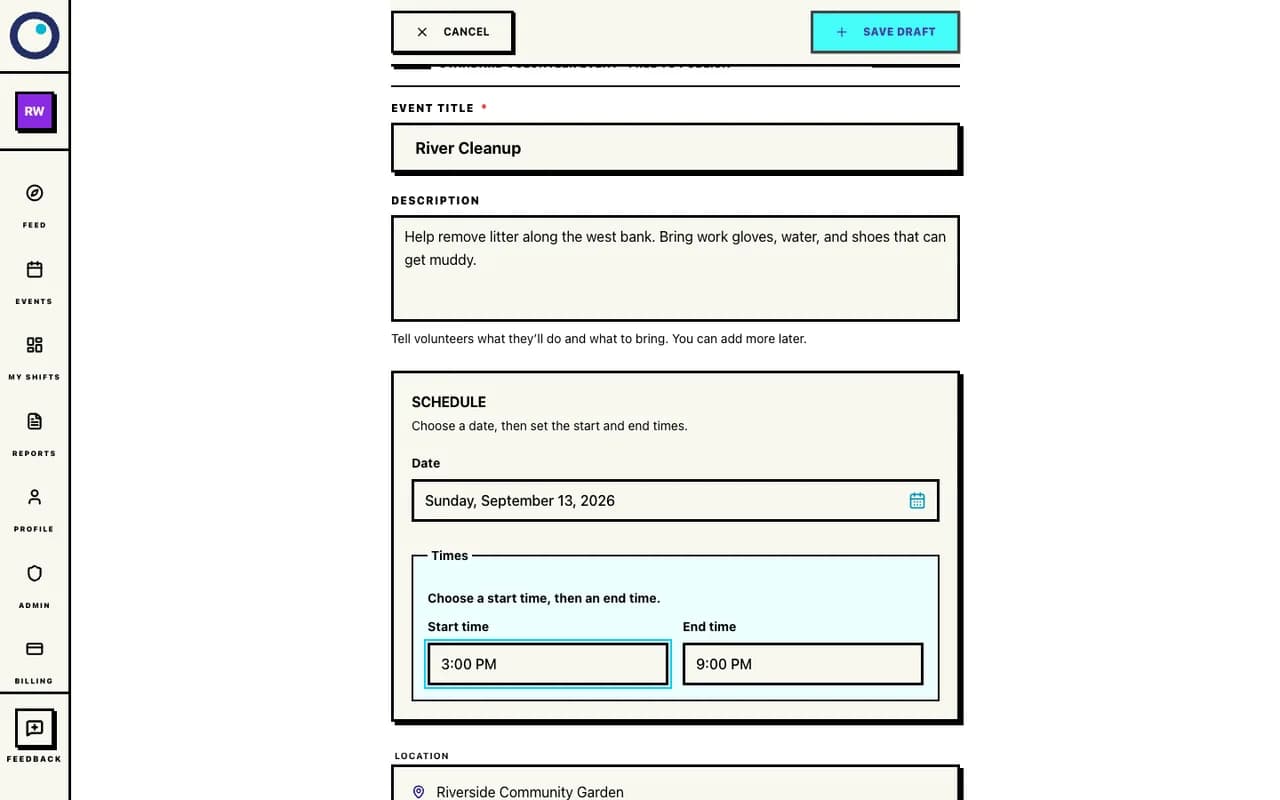
Enter the details people need and save the event as a private draft. Open the draft again to adjust the description, date, times, or meeting place. Keep editing while the plan is still taking shape.
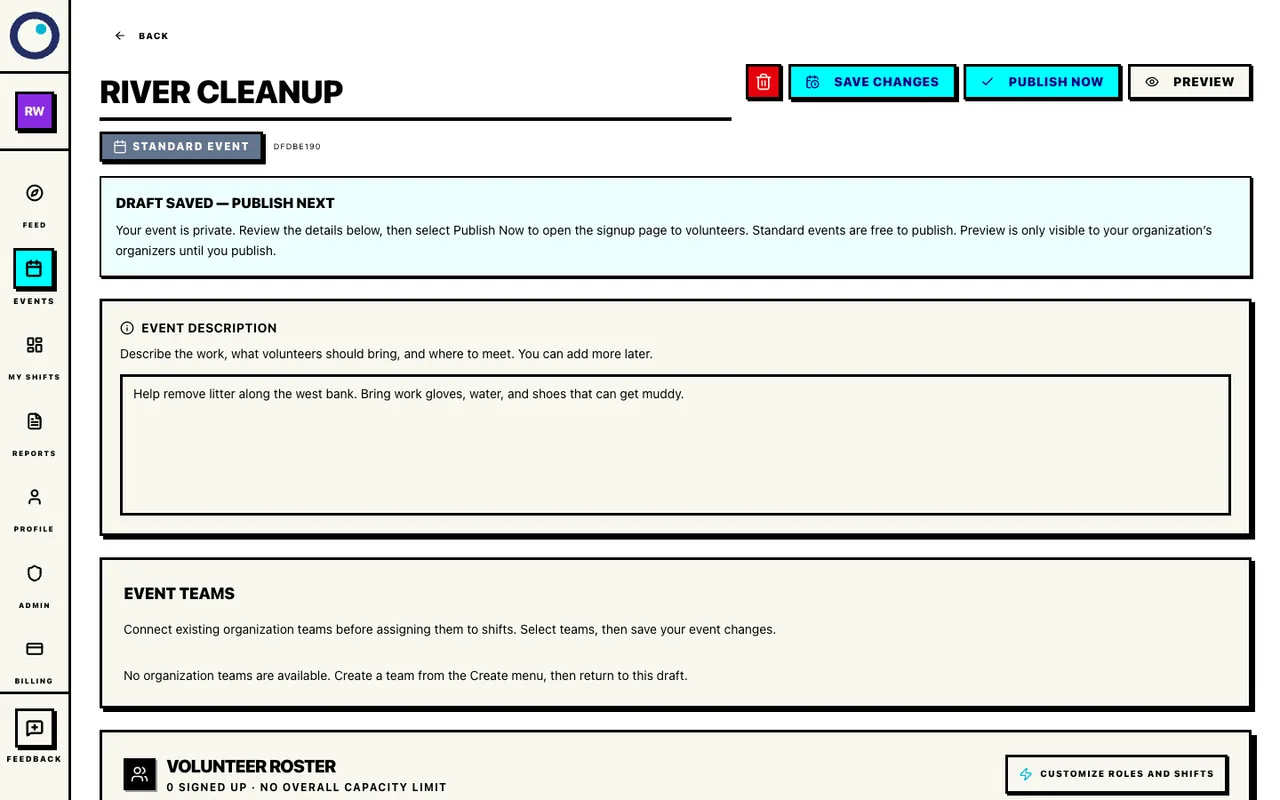
Save the changes before you make the page public.
Edit the details as plans change
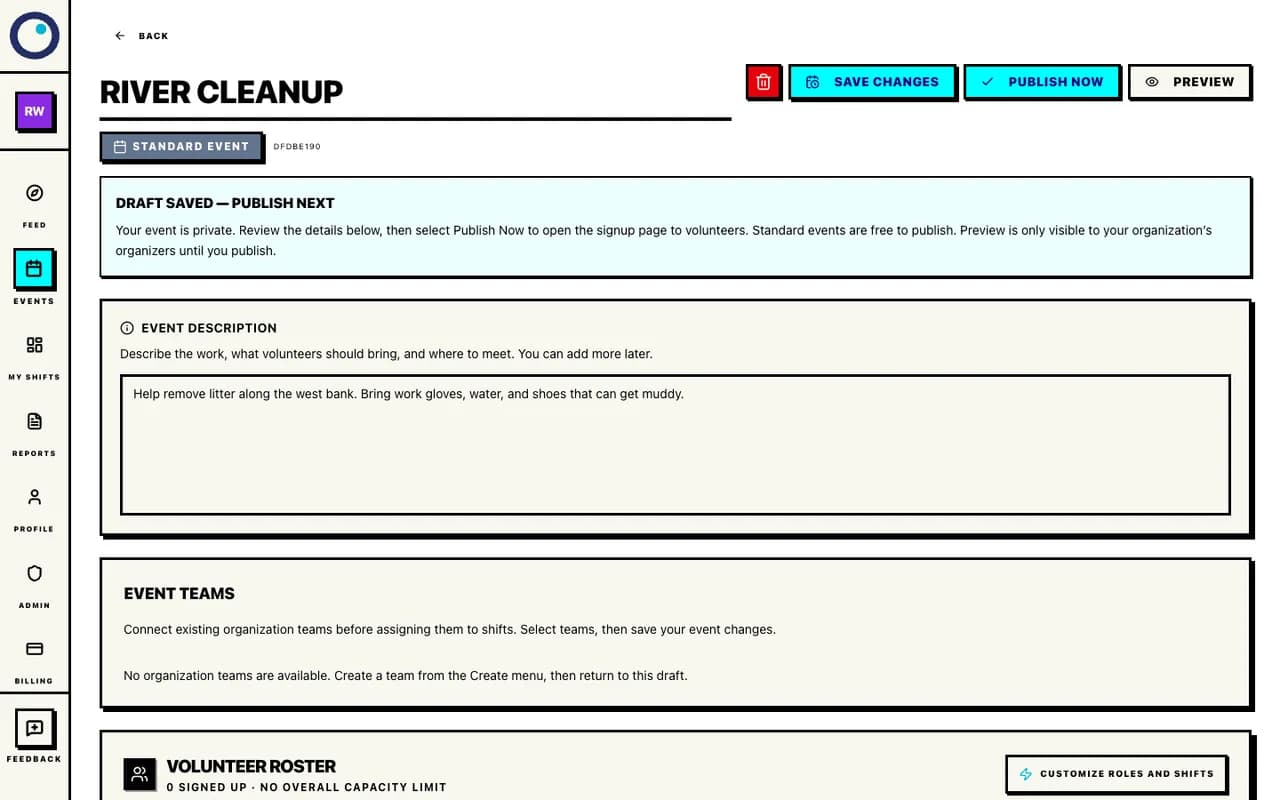
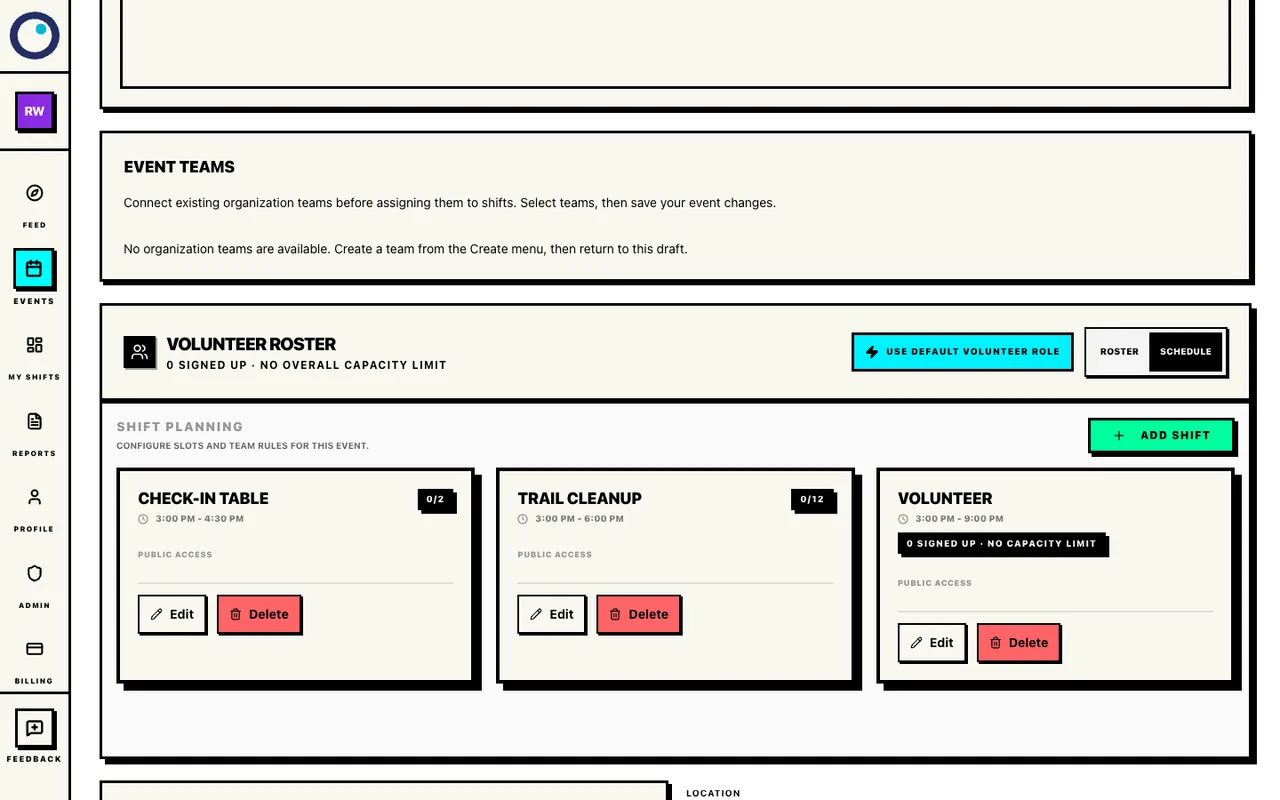
Use the description to explain the work and what to bring, then select Save Changes. Choose Customize roles and shifts, then Add Shift for each job. Set the time and number of people needed. Here, Trail Cleanup has 12 places and Check-in Table has two; the general Volunteer role is also available without a capacity limit.
Each shift shows its own time and available spots.
Add roles and shifts
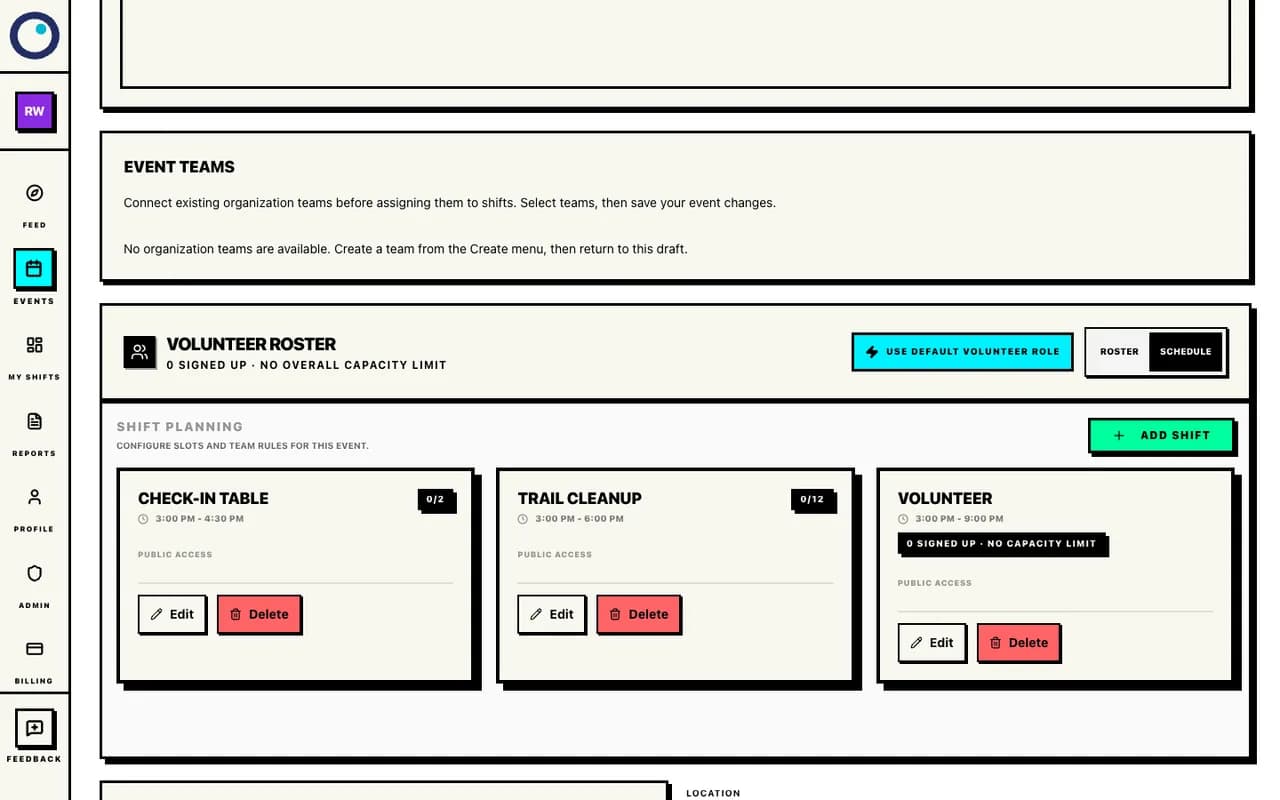
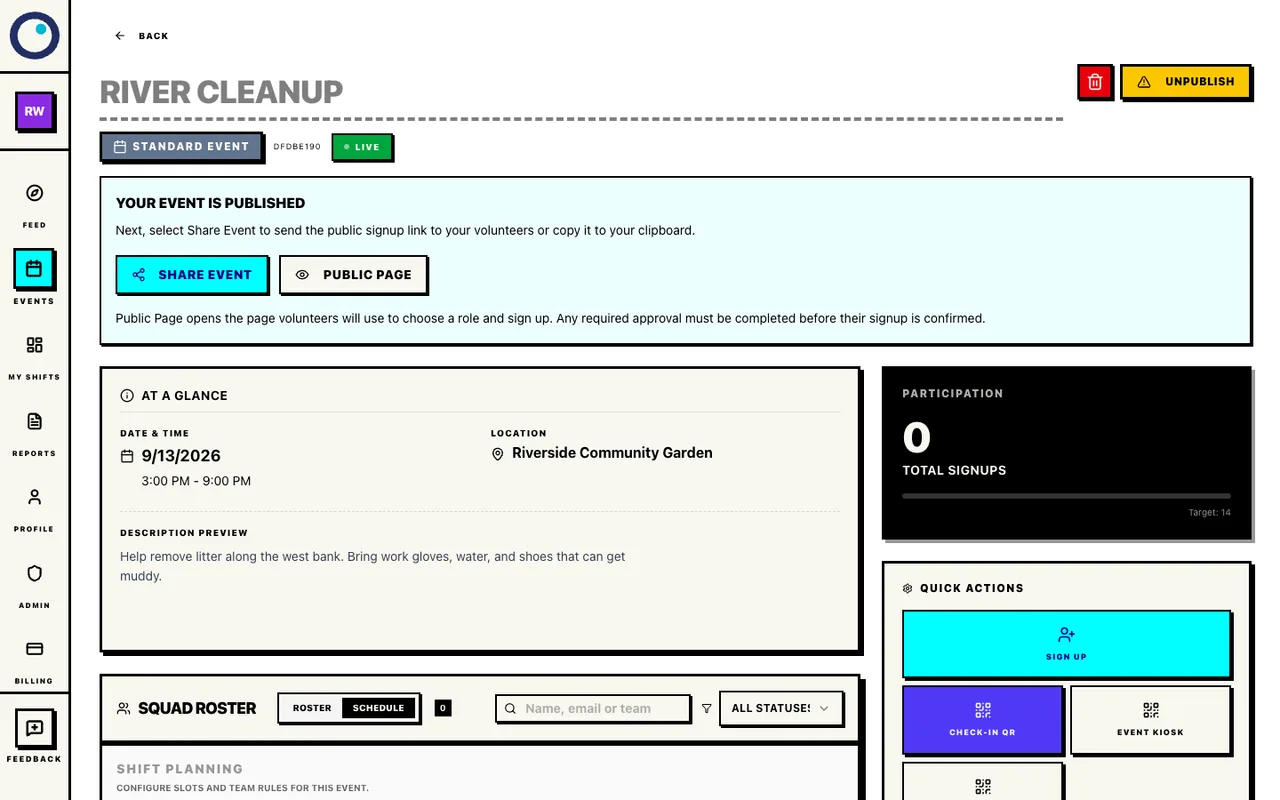
Use Add Shift to create a job, or Edit to change an existing role’s time and capacity. Select Preview to check the details, then Publish Now when you are ready for signups. Use Share Event to copy the public link into your website, email, or group chat.
Everyone uses one current event link.
Publish and share the page
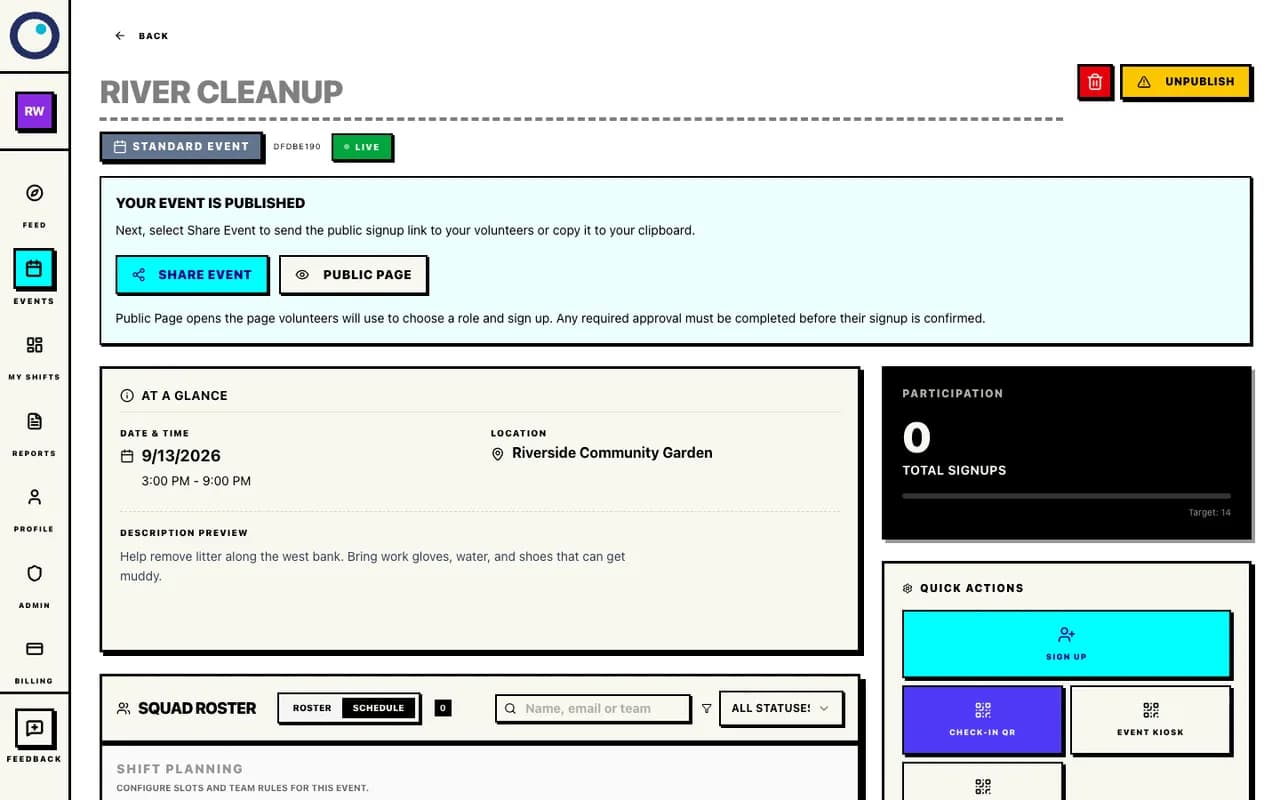
Live confirms publication; Share Event copies the public link.
02 · Join
What your volunteers see
Volunteers read the public page, choose a role, sign in or create an account, and confirm their place with a verified email.
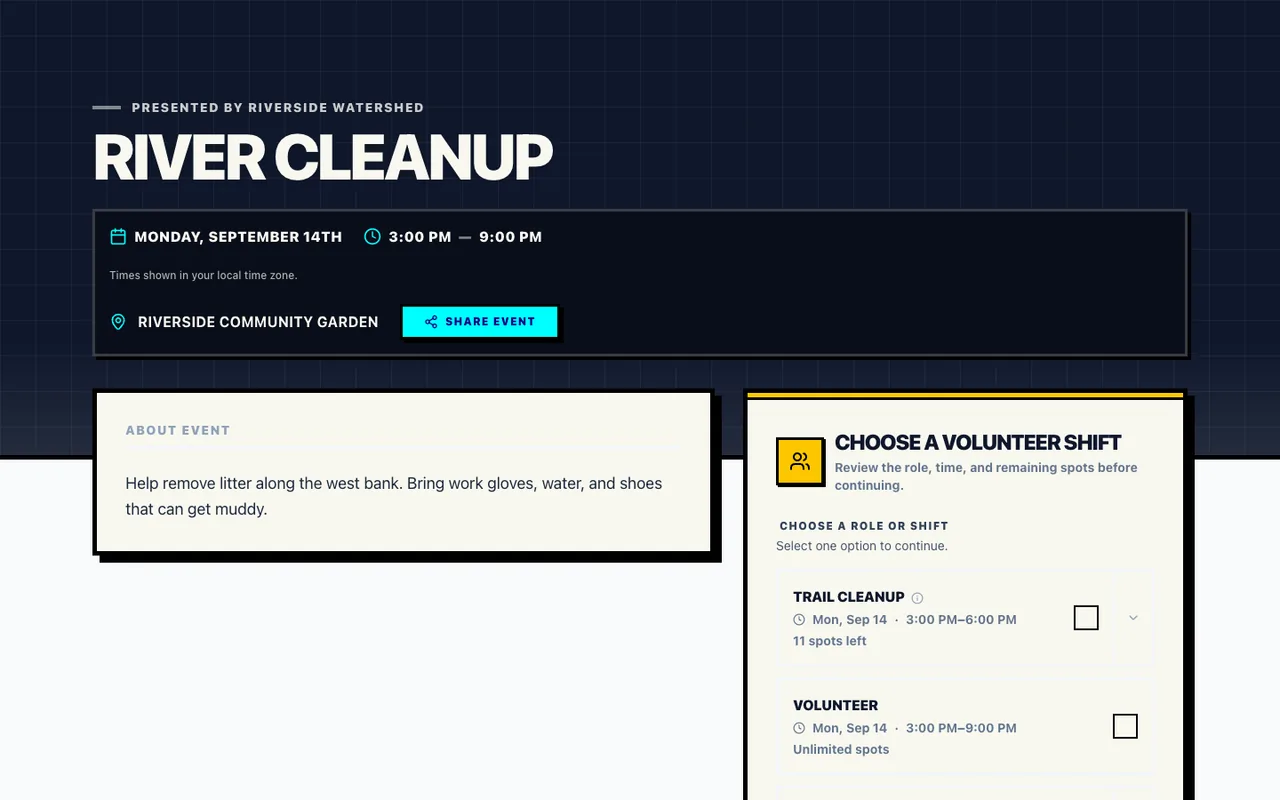
Before signing up, a volunteer can read the work, date, meeting place, and every available role on the public page.
Anyone can read the event without an account.
Read the public event page
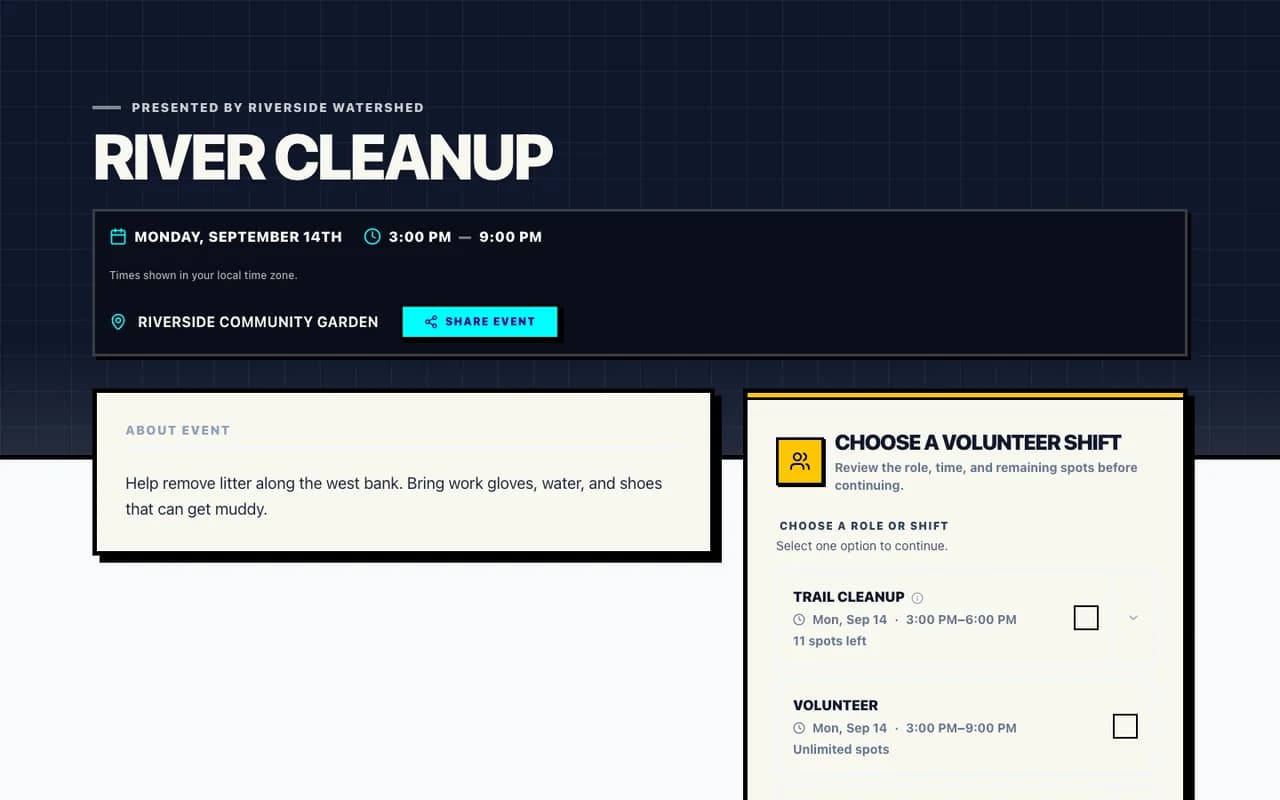
Volunteers see the same details you entered, along with the roles that still have room. After choosing a role, select Continue to Sign Up. New volunteers enter their name, email, and password, or use Google. Returning volunteers can sign in. After email verification, they return to the event with the role ready to review.
The selected role is saved, but a place is only booked after signup is confirmed.
Sign in or create a volunteer account
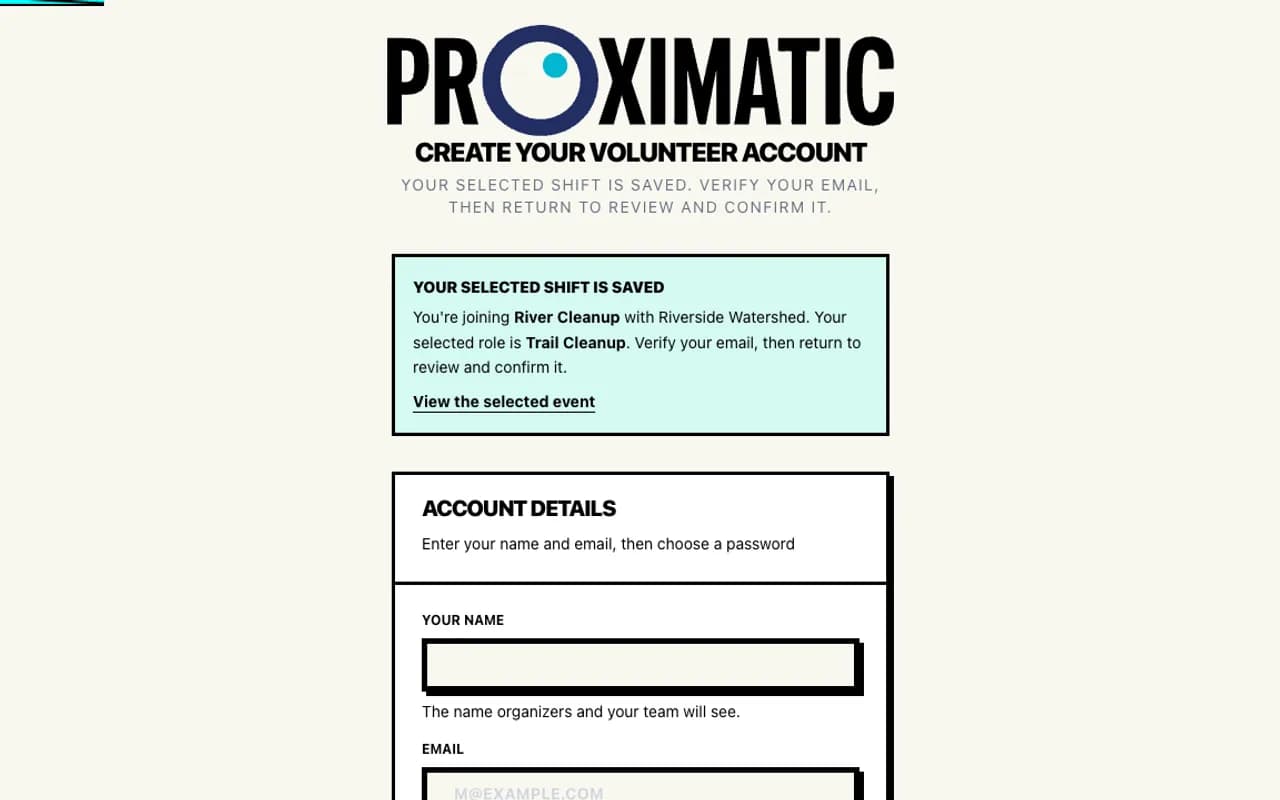
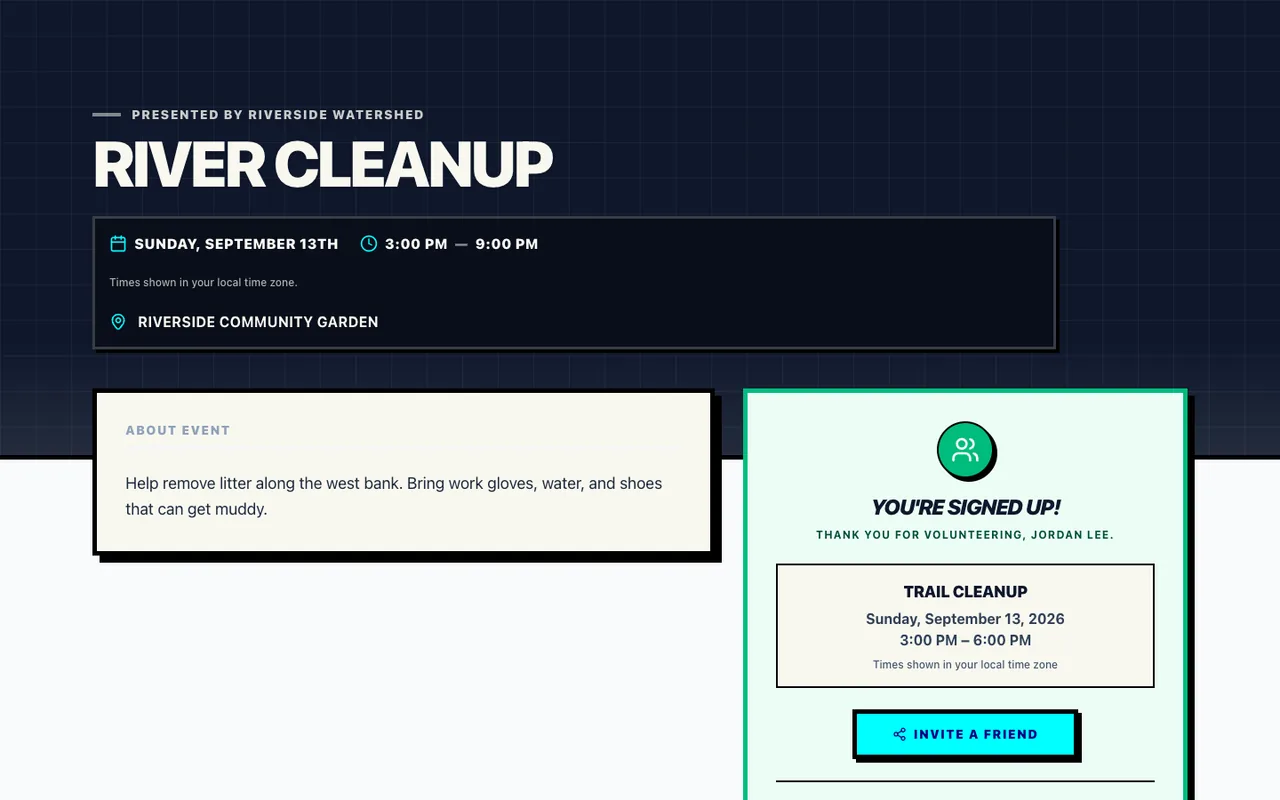
The signup form shows River Cleanup and Trail Cleanup. Back on the event page, review the role and time, then select Confirm Signup. An available open role confirms immediately. If the organization or team requires approval, follow the request shown on the page and check for a confirmed signup before counting the place as booked.
The coordinator receives the confirmed assignment in the roster.
Confirm the selected role
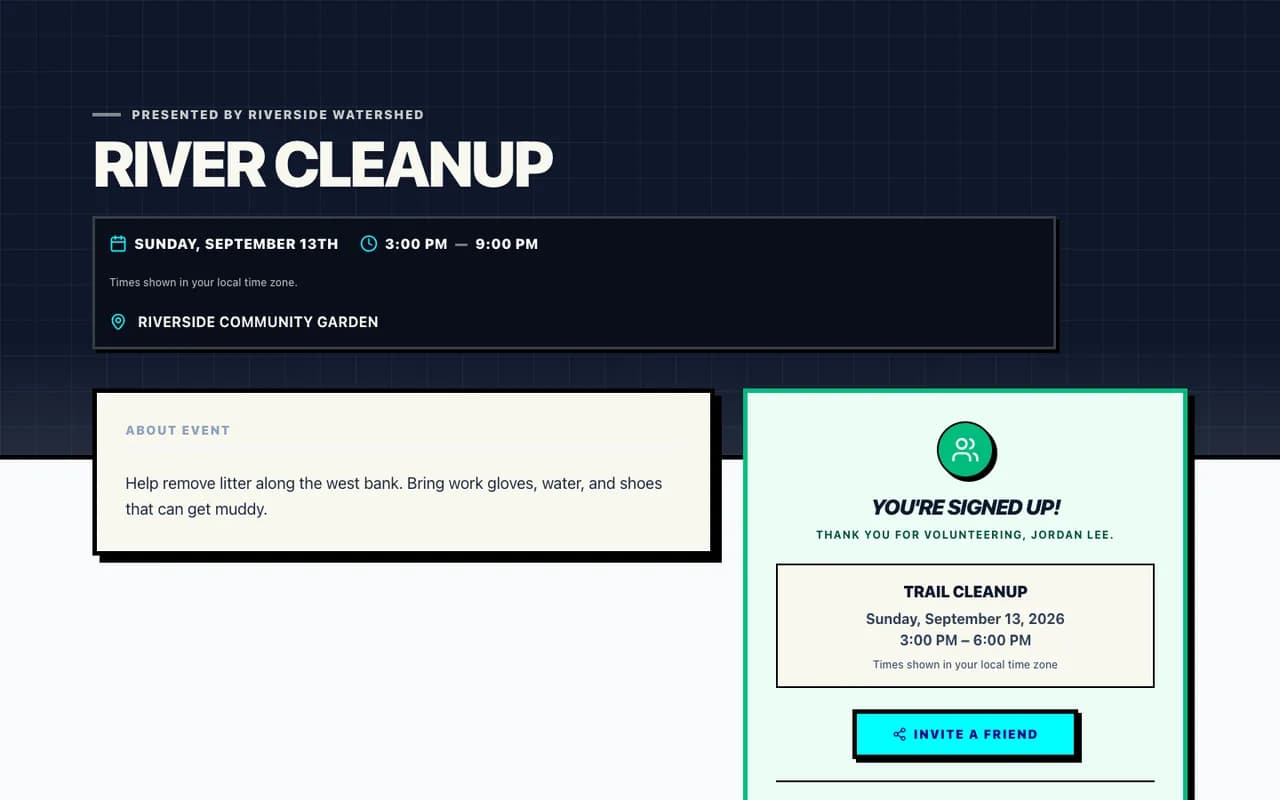
Jordan is signed up for Trail Cleanup from 3–6 PM.

03 · Run
Welcome people and record attendance
Use a rolling QR for registered volunteers, or a reusable printed sign when you need role choices or on-site signup.
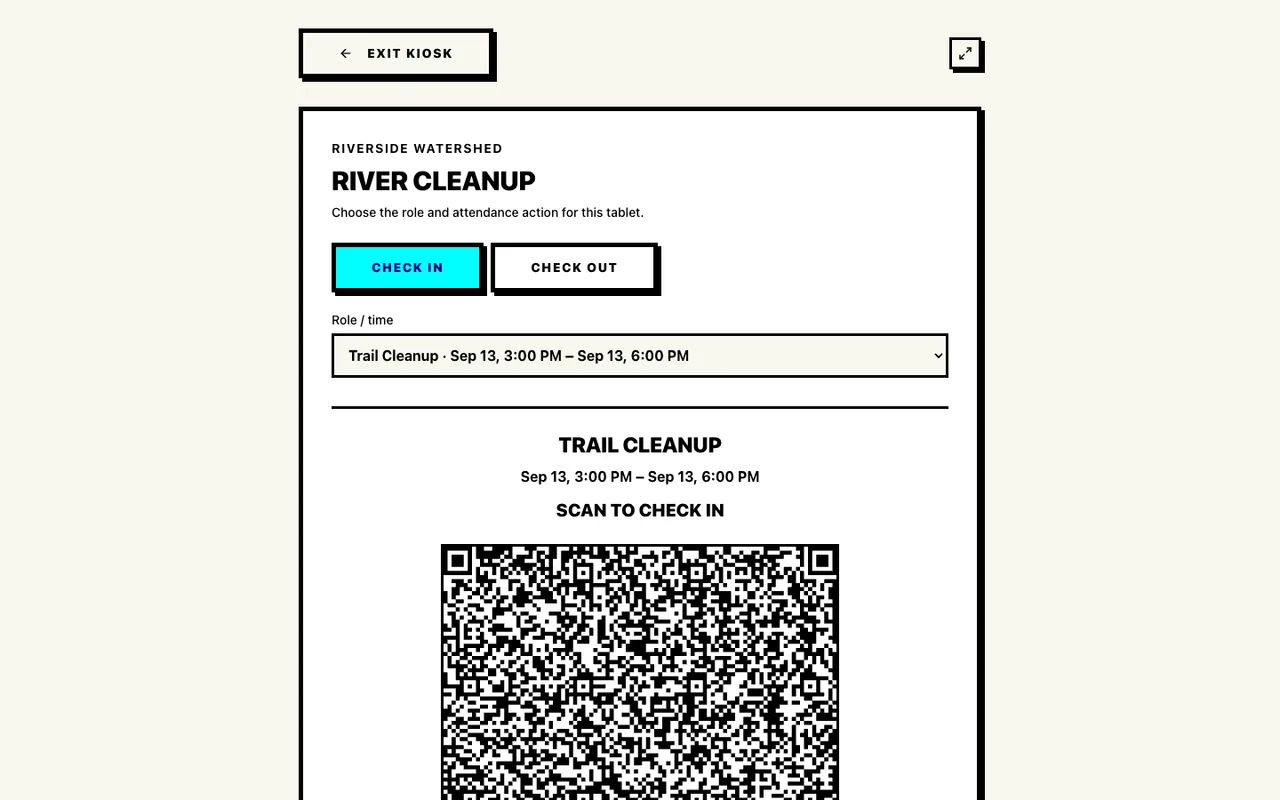
Open Event Kiosk, choose the role and time, and select Check In. Display the screen on a tablet at the welcome table. Volunteers already signed up for that role scan with their phone camera; if signed in, their check-in records immediately. Otherwise, they enter their email and the six-digit code sent to it, and check-in resumes.
For an early departure, switch to Check Out and have the volunteer scan the new code. Keep the rolling code on screen: it refreshes after use or expiry and is not a reusable printed sign.
Welcome registered volunteers with the rolling QR
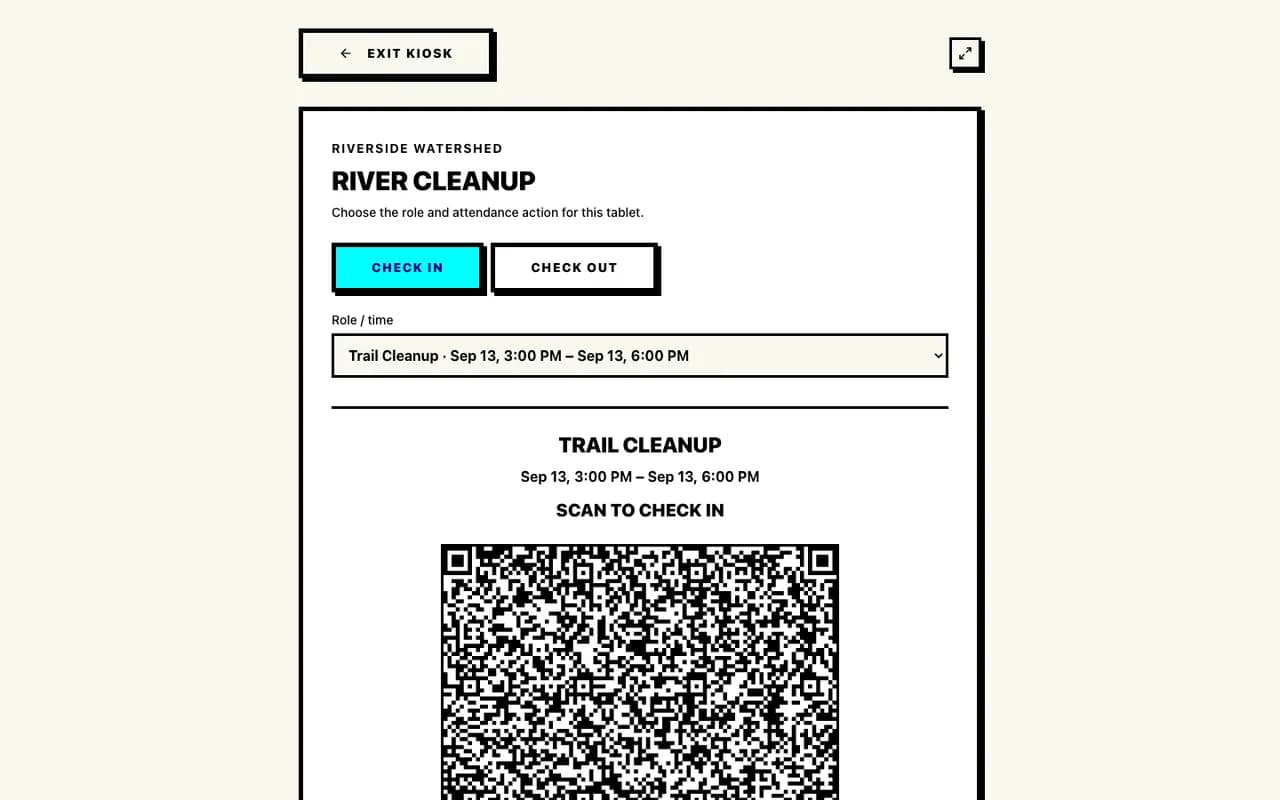
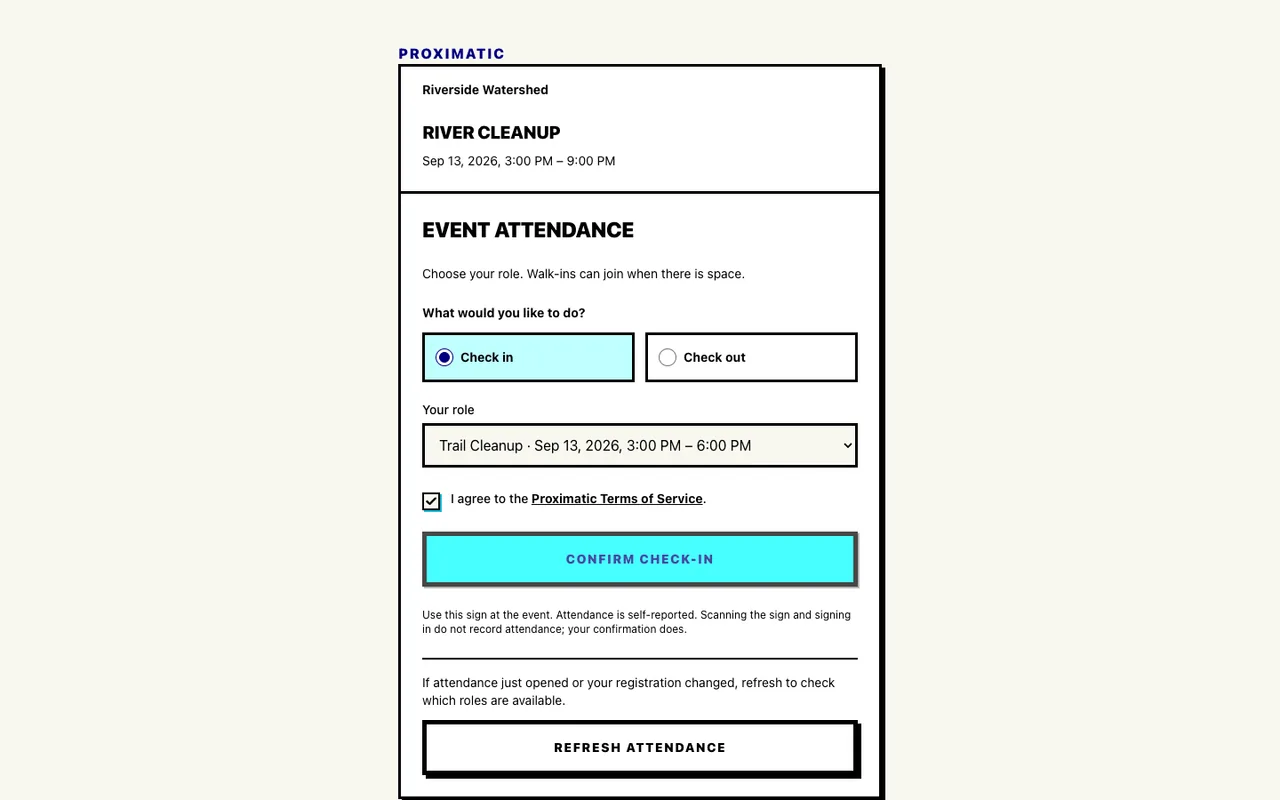
Select Trail Cleanup and Check In; Check Out records departure. For a reusable sign, choose Printed Attendance Signs from the event. Use a sign for one role or for the whole event. After scanning, volunteers sign in or create an account and verify their email as needed, choose check-in or checkout and an eligible role, then confirm. Check-in also asks them to accept the displayed Proximatic terms.
Signs are for registered volunteers by default. To welcome walk-ins, enable Allow walk-ins to join available roles for an open Standard event with unrestricted roles.
Use a printed sign when it suits your event
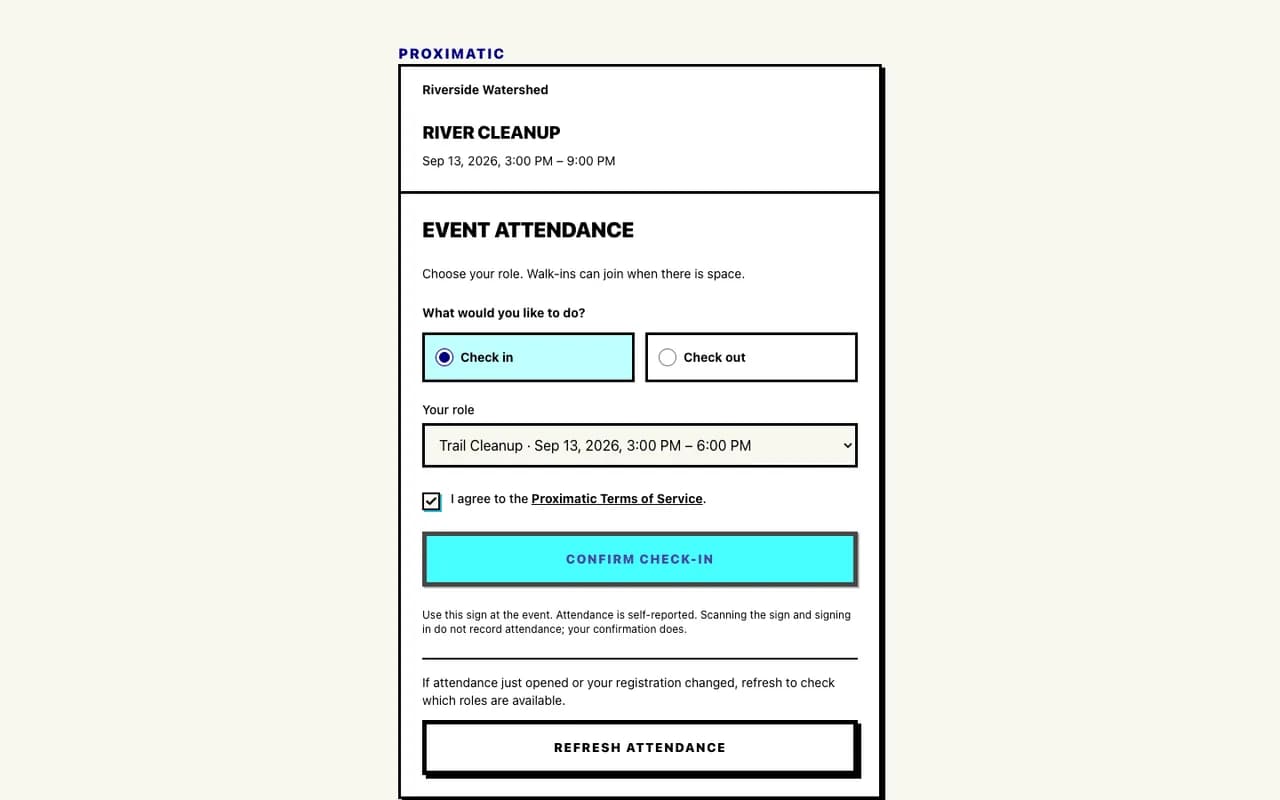
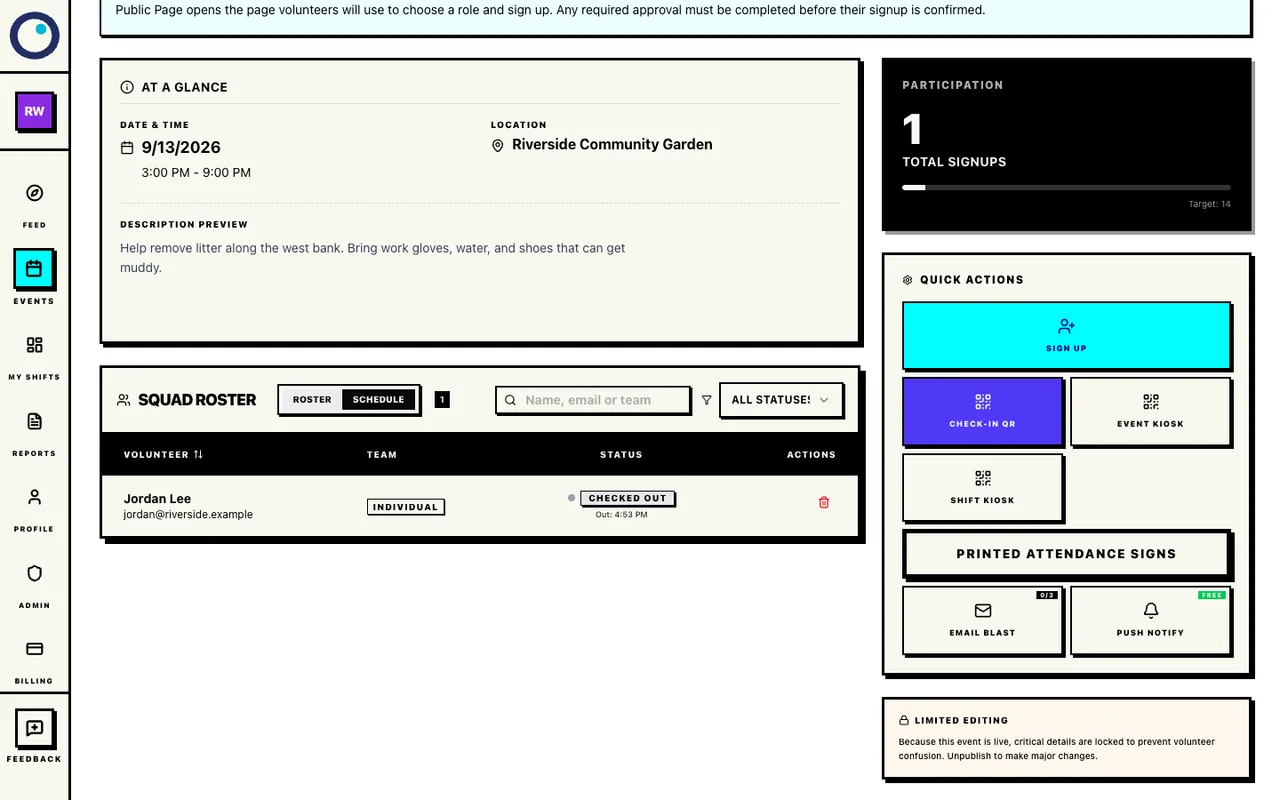
Select Check in, Trail Cleanup, and the terms checkbox, then confirm. Back in event management, the coordinator can see the roster and current attendance status. Use the same view to welcome late arrivals, confirm coverage, or help someone find the right role.
Check someone’s status here when you need to know whether they have arrived or left.
Check the roster during the event
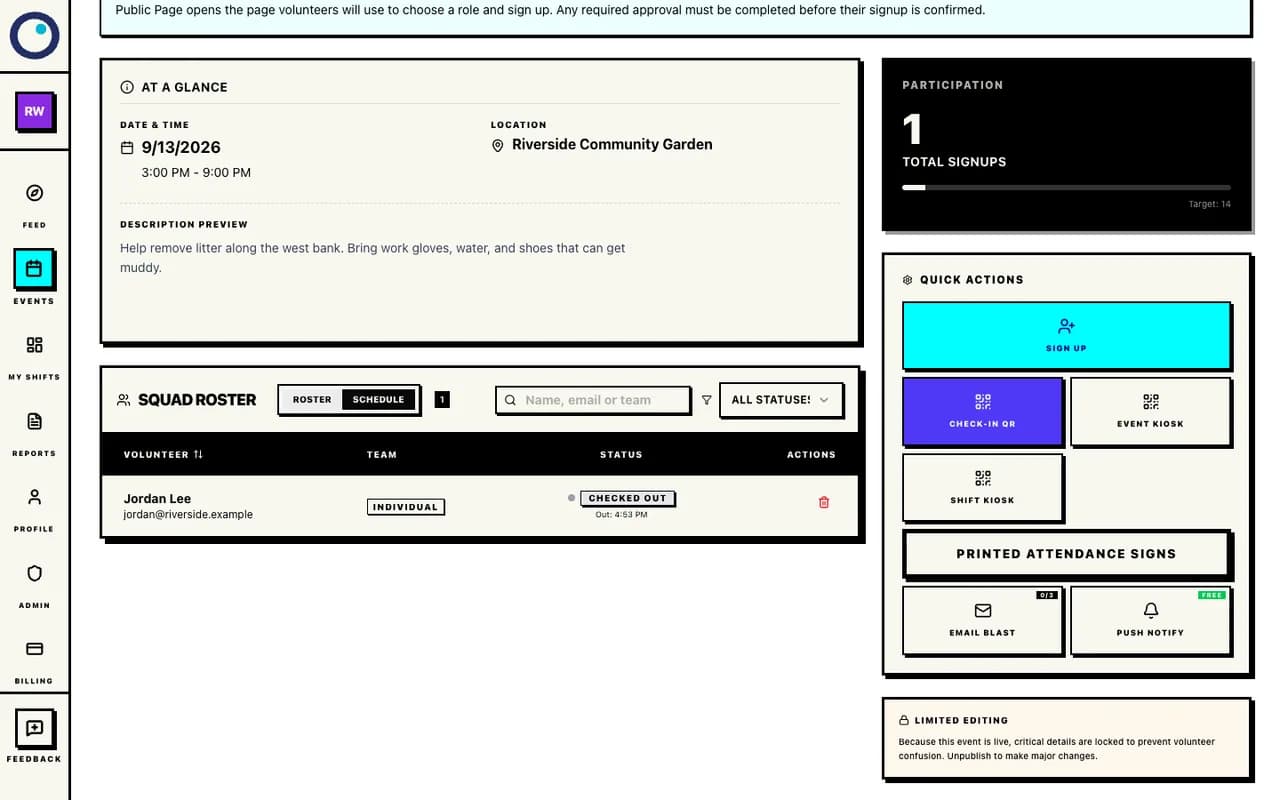
Jordan’s row shows Checked Out and the departure time. Switch between Roster and Schedule to review people or shift coverage.
04 · Review
Review and download volunteer hours
After the event, check the attendance totals and download the report for your organization.
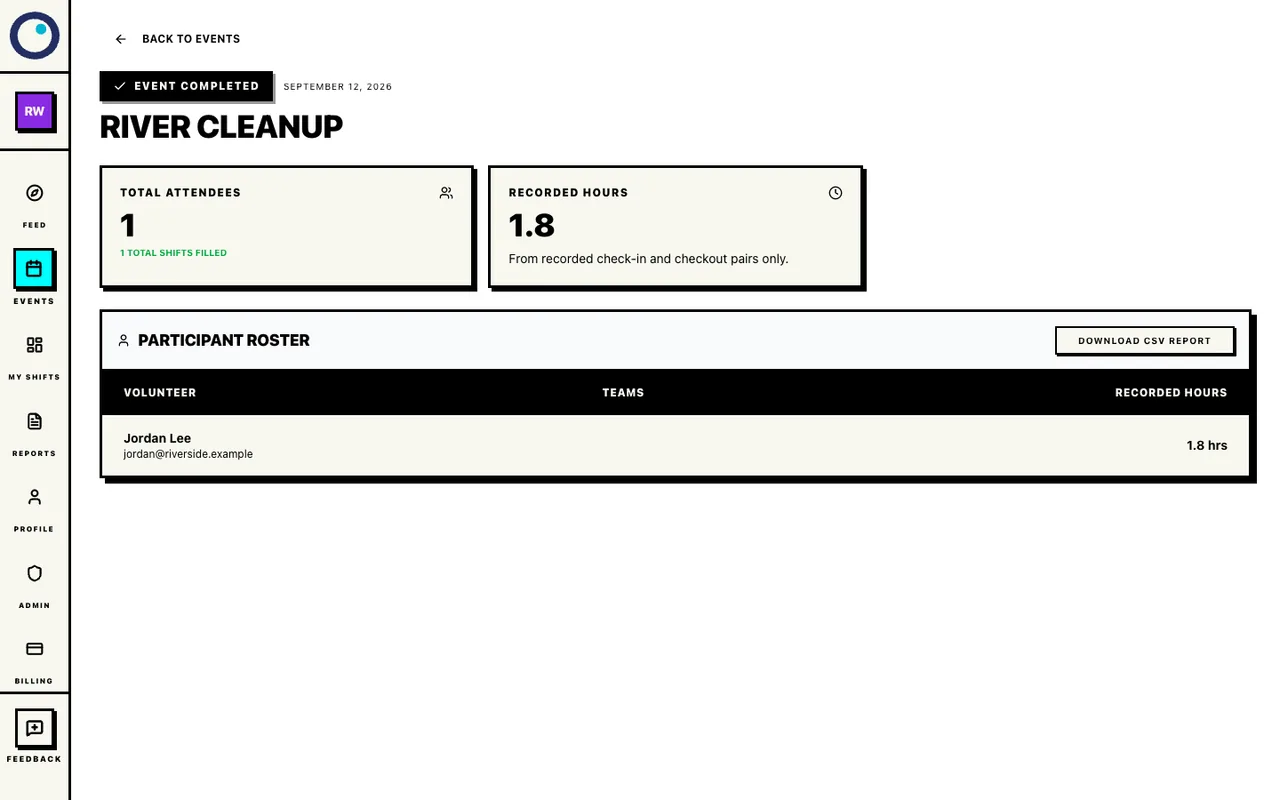
Open the completed event summary to see attendees and recorded hours per volunteer. Select Download CSV Report for names, emails, teams, hours, and any attendance notes. Review any flagged records before sharing the file.
An early checkout keeps the recorded departure time. For someone still checked in, Proximatic uses the shift end, or event end if earlier, when you next open the roster or report. Those hours use the scheduled finish rather than a departure scan.
Review the attendance report
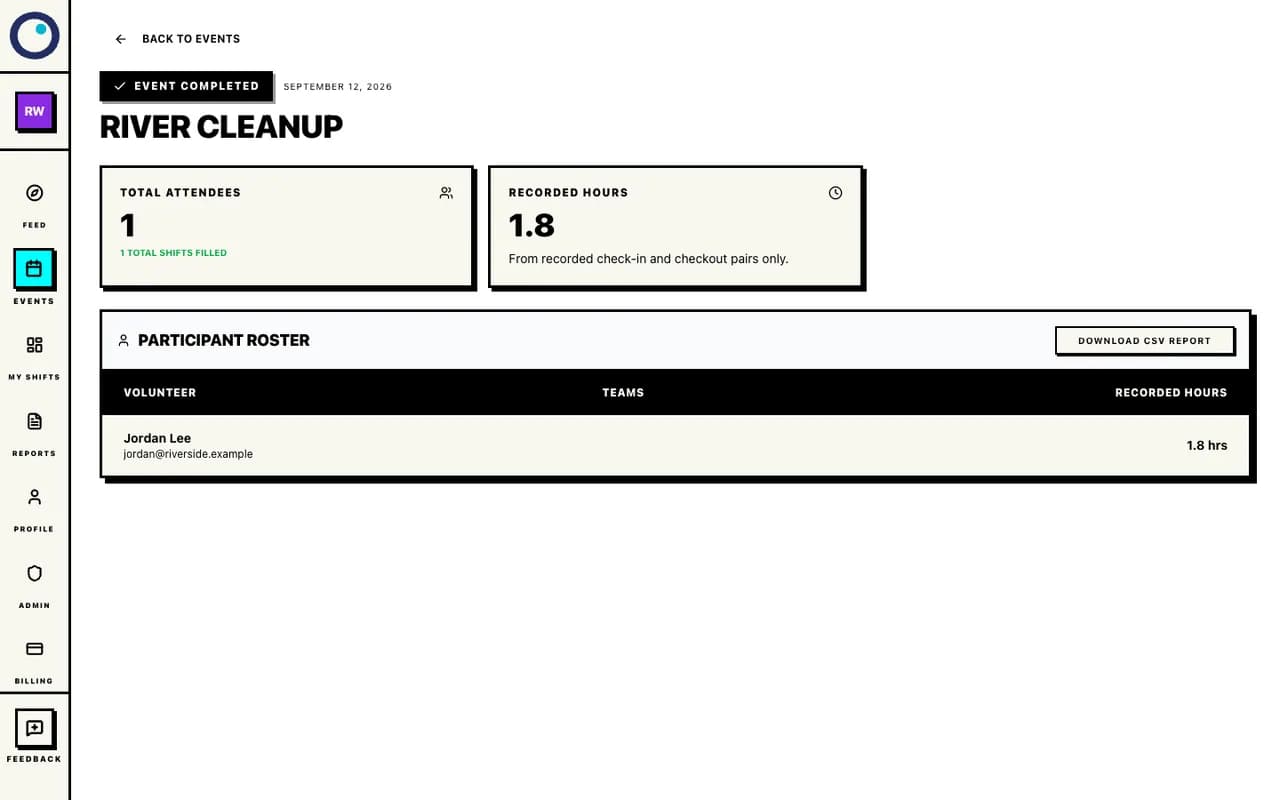
One attendee and 1.8 recorded hours. Select Download CSV Report to share the details.
Volunteer approval
Use approval for the roles that need it.
Use open roles when anyone eligible can help, or organization and team approval when you need to review volunteers first. A request waiting for approval does not reserve a spot; the place is booked when the signup is confirmed.
Before your first event
A few practical questions.
Is it free?
Creating and publishing a Standard volunteer event is free, including signups, roles and shifts, and attendance. No credit card required.
Do volunteers need an account?
Yes, to confirm a signup. Reading the public event page is open to everyone. Volunteers choose a role, sign in or create an account with Google or name, email, and password, verify their email, then review and confirm the signup. For day-of rolling QR attendance, someone already registered for that role can scan while signed in or use the six-digit email code. No app download is needed.
How are volunteer hours recorded?
Hours start at the recorded check-in. An early checkout records when someone leaves. If they remain checked in, opening the roster or report after the shift or event ends closes attendance at the earlier scheduled end. That finish time comes from the schedule, not a departure scan. Attendance is self-reported; use your organization’s review process if you need to certify service hours.
Does check-in work without internet?
Check-in needs a connection at the moment of the scan. That live connection lets the signed QR verify the event and update the roster immediately; a signed-in volunteer scans once, with no second confirmation. Put the kiosk or entrance device where Wi-Fi or mobile data is strongest and test it before the event. The current QR flow does not queue scans while a device is completely offline, so connection belongs on the event-day setup checklist.
Try it with your next event.
Create a draft for the next event on your calendar. Add the details you know, keep it private while you plan, and publish when you’re ready.
Want to see the other guides? Browse the knowledge base.