For organizers · Roles & shifts
Use the shift auto-scheduler
Give Proximatic the full schedule, the approved people who can work it, and their availability. Auto-Schedule handles the first pass so you can review a roster instead of placing every name by hand.
Complete example · food pantry staffing
A two-week pantry schedule, from saved shifts to saved assignments
The example follows one food pantry event across two weeks: 20 approved volunteers, 42 shifts, and 126 places. Ten people are available on weekdays, five on weekends, and five every day. An active rule allows at most one new volunteer per shift.
Before you start
- Sign in as an admin or owner of the event’s organization and select that organization.
- Use a Draft event with scheduling enabled and at least one shift. Published events must be unpublished before their schedule can be replaced.
- For a team-limited shift, set its Team requirement in Volunteer roster → Shift Planning and approve the team members. Pending team applications and banned members are not eligible.
- Give each person availability that covers the whole shift. A person without declared availability is not eligible for an automatic assignment.
- Check the active rules for teams used by shift requirements and the saved versions attached through Shift Logic. Inactive legacy team rules are not included; editing a template does not change an already-bound version.
Auto-Schedule replaces saved assignments immediately on success. Existing manual assignments are not locked or preserved as a starting constraint. Schedules with recorded attendance or table reservations cannot be replaced.
A different entry point
Starting from a plain-English event request?
This guide covers the direct Auto-Schedule toolbar. AI rostering also offers a proposal path: AI setup prepares the roles, shifts, and schedule, then opens the draft with the schedule applied. For an existing event, an AI schedule proposal waits for Approve & apply. Publication remains separate in each workflow.
Use the same flow in your event
Follow these three steps in your draft event. Use the screenshots to locate each control.
Create a Standard event in Draft, turn on scheduling, and add the work that needs coverage. This Riverside Food Pantry example uses one event spanning October 5–18: three meal shifts each day, three places per shift, 42 shifts, and 126 volunteer places. One person is already assigned; 125 places remain. For an event series, run Auto-Schedule for each event separately; the shared calendar can show more than the event being scheduled.
The scheduler cannot invent work. If you create three one-person shifts, a result of three assignments is all the data you gave it. That proves the run worked; it does not show why a larger roster saves time.
Build the full schedule before you run it
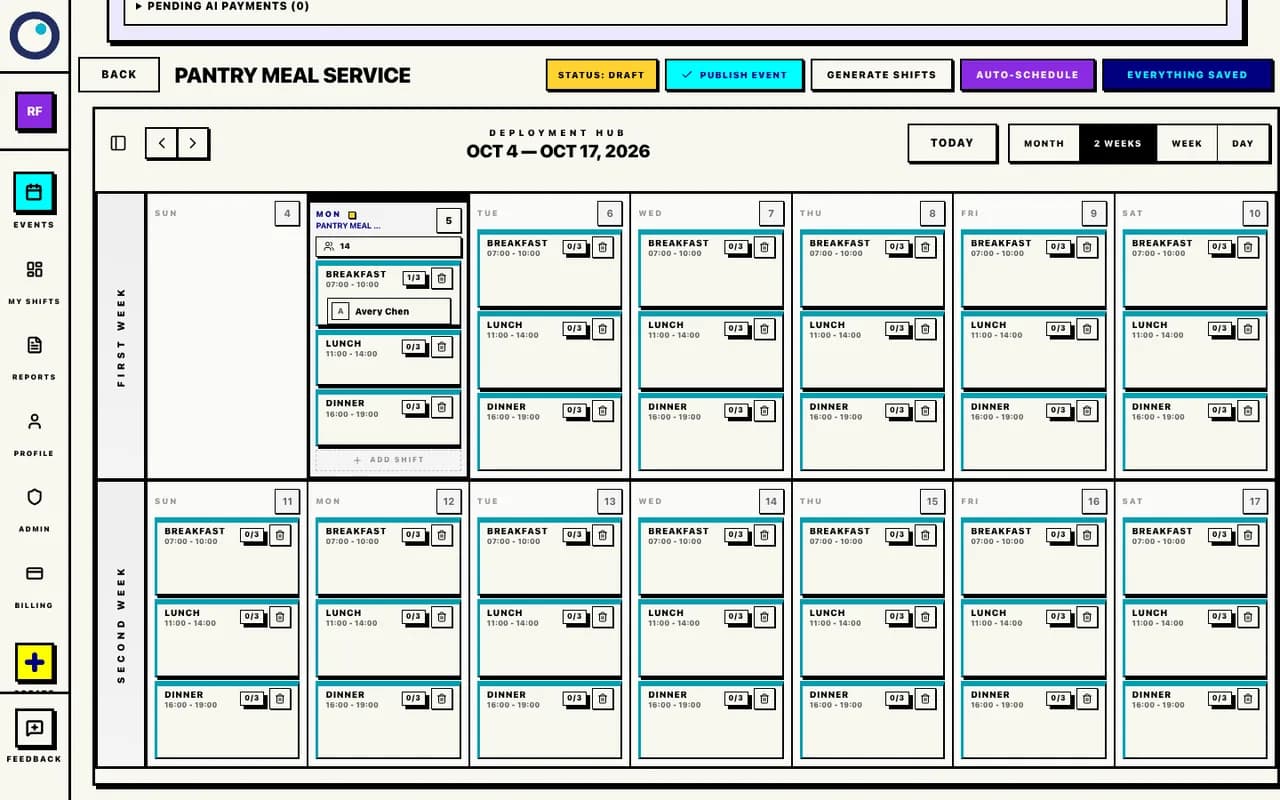
Saved draft with one assignment; run Auto-Schedule from the top toolbar. Before running, make sure the people it may place are approved team members. Add their weekly or one-off availability. If a shift is limited to a team, set its Team requirement in Volunteer roster → Shift Planning; attach saved Shift Logic only when that shift needs it. Then open the draft event’s scheduler and select Auto-Schedule when you are ready to replace the saved assignments.
Each assignment must fit the whole shift, obey capacity and team rules, and avoid overlapping another assignment. A successful run saves the generated assignments directly, replacing the event’s existing assignments. There is no preview or separate Apply step, and you do not need to select Save Changes to commit the generated result. Running it again can replace the schedule again.
Give it an eligible pool, then run Auto-Schedule
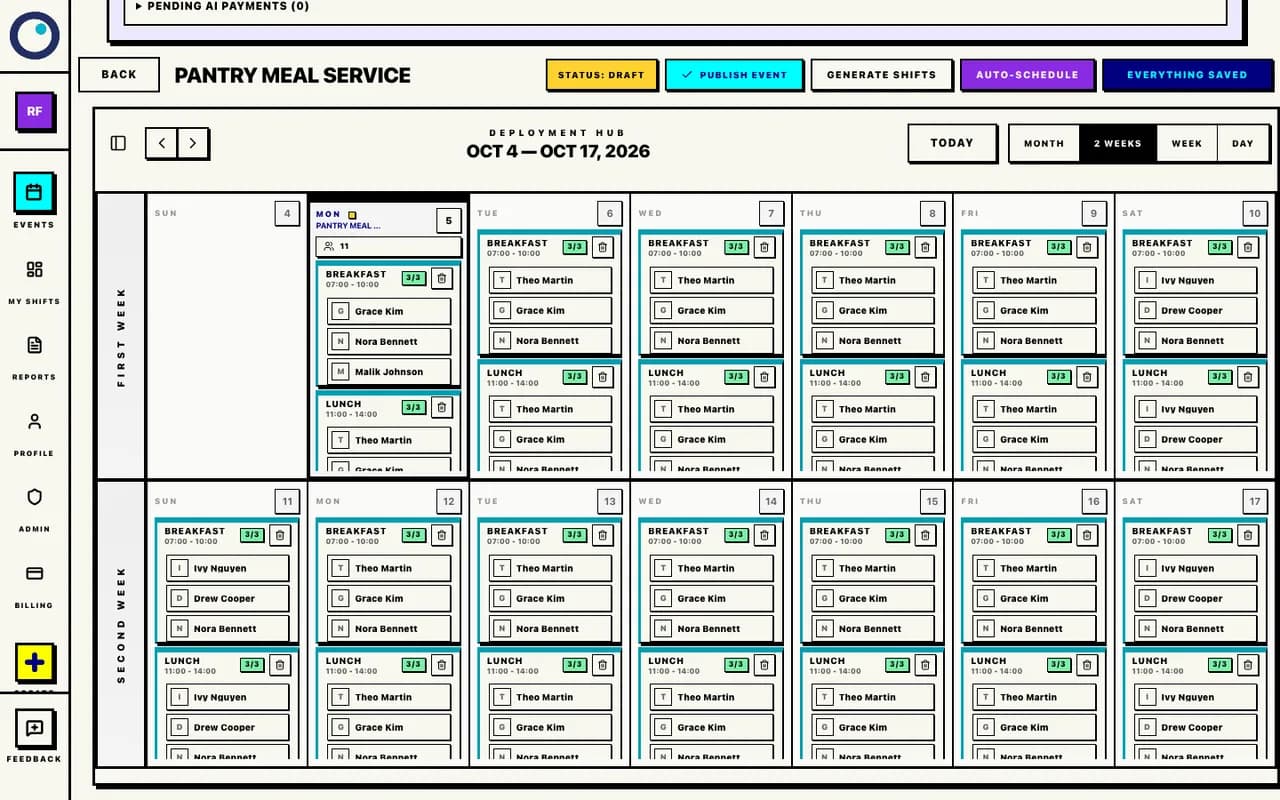
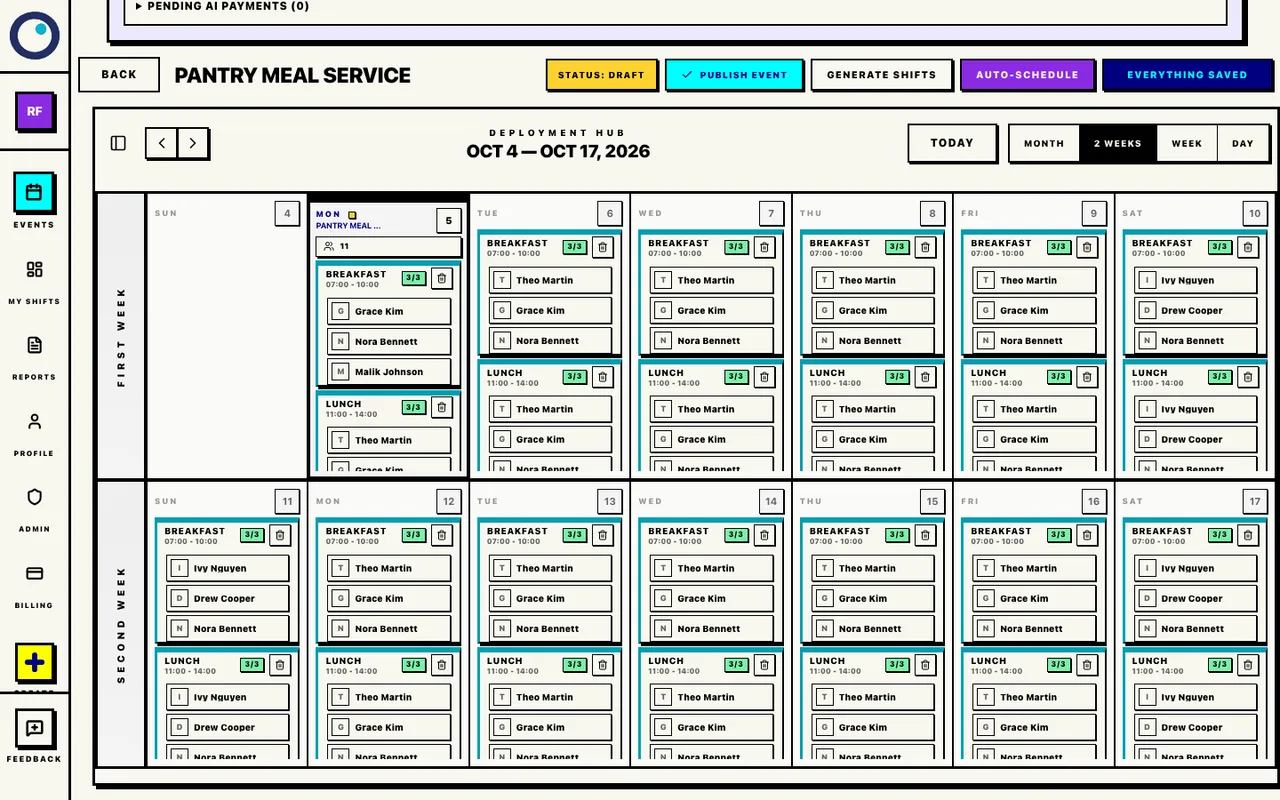
Auto-Schedule saved 126 assignments across 42 shifts. After a successful run, use the 2 Weeks view to scan the plan, scroll within the calendar to read names and fill counts. In event management, open Volunteer roster → Roster to review the assigned people. Navigate through all dates, including those outside the current calendar range, and find any gaps. Reload or reopen the event if the schedule still shows the previous assignments. Make any manual changes you want, then save them before publishing.
The solver may leave shifts unfilled or partly staffed. A success message means the generated assignments were saved; it does not mean every shift is full. The result count is the number of assignments saved, not the number of fully staffed shifts. In this run, 126 assignments cover 126 places. Full coverage does not mean an even workload: the solver can repeatedly assign the same available people. Check each person’s load before publishing. In a smaller event, three assignments may be correct—but they are still only three assignments.
Review the saved roster before you publish
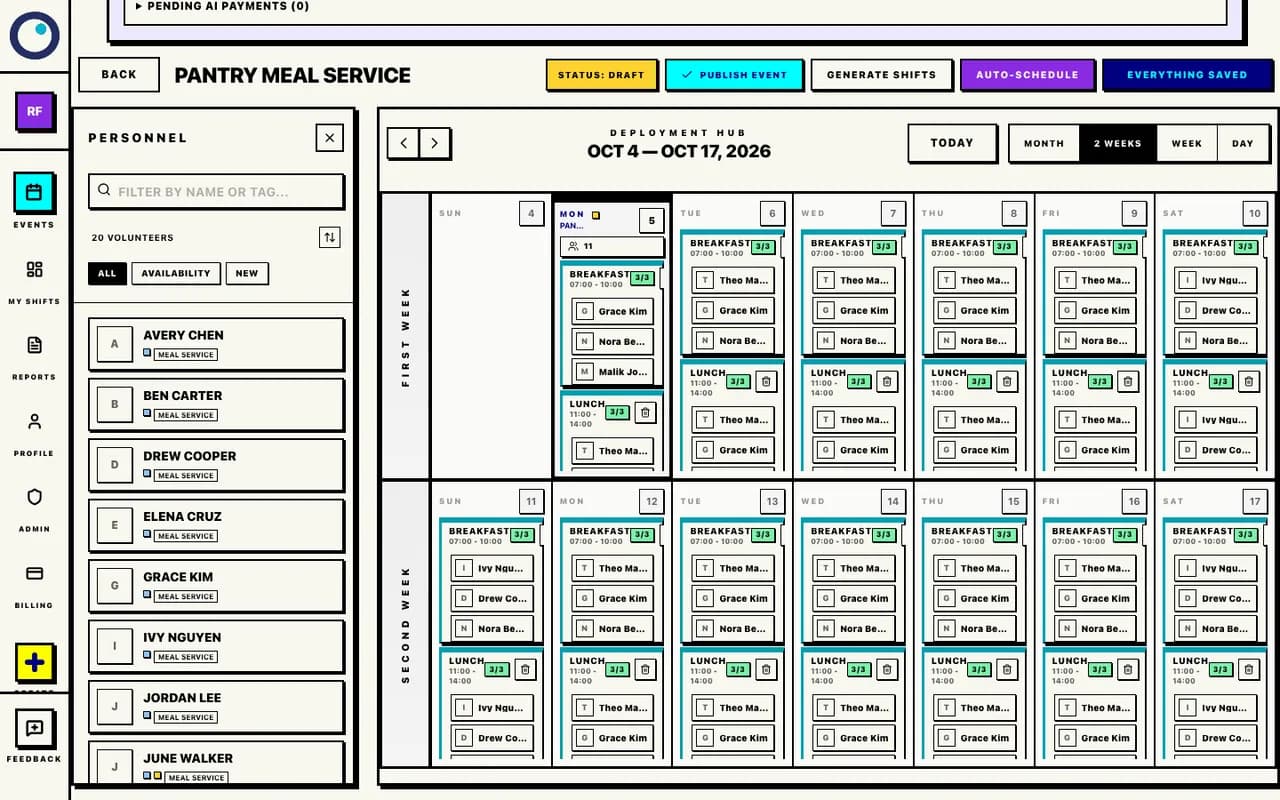
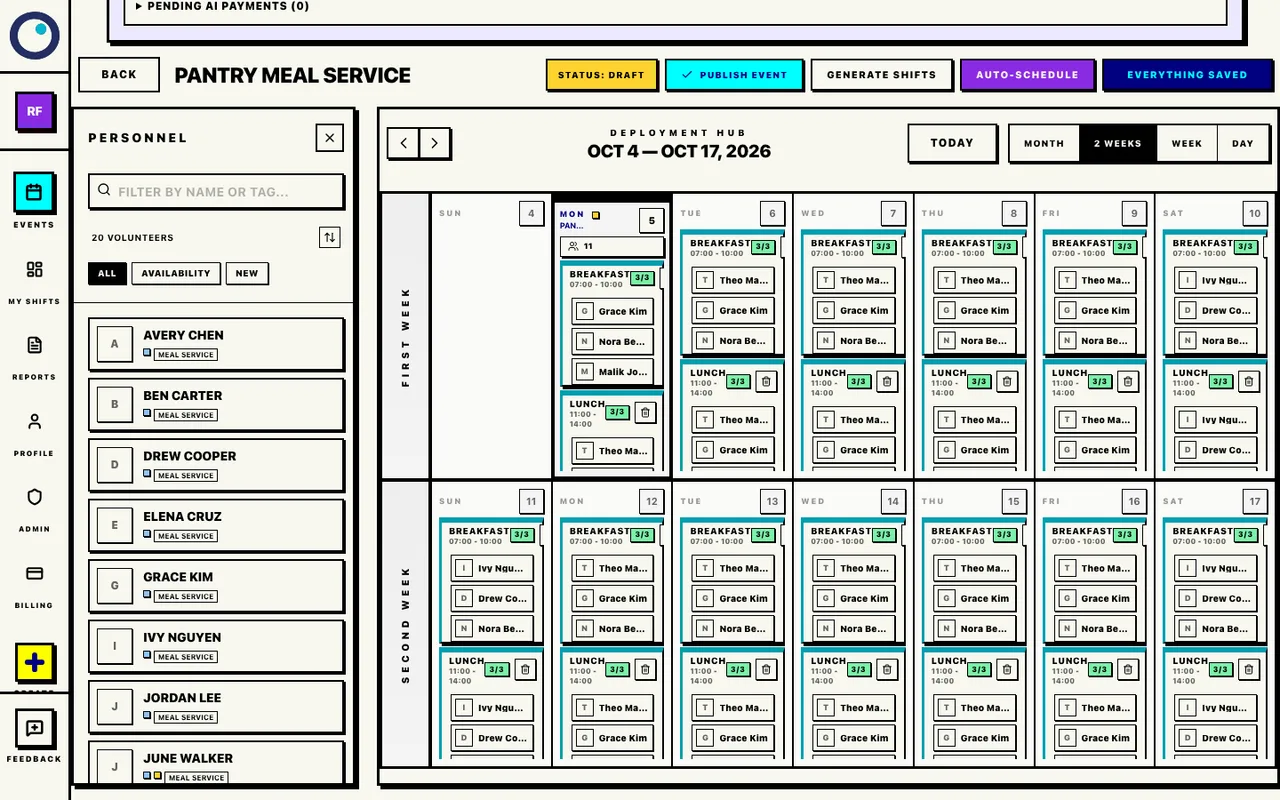
Personnel shows the approved pool; review workload in Volunteer roster.
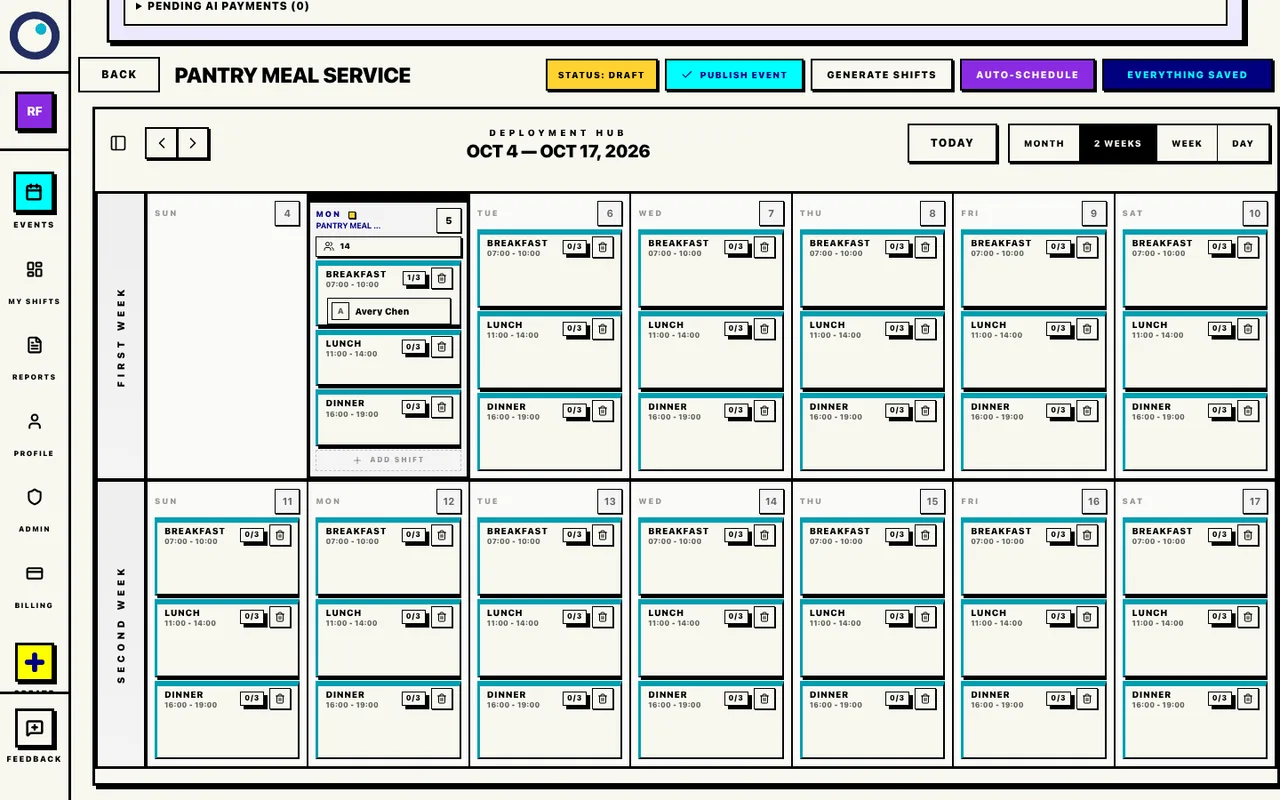
Read the result count correctly
Auto-Schedule is designed for organizers coordinating larger teams across multiple shifts. Review the generated assignments and staffing gaps, then ask not only “did it run?” but “how much of the plan did it cover?”
42 shifts
The work blocks people must cover.
126 places
Three volunteer spots across each of the 42 shifts.
126 assignments
One person assigned to one shift.
- A successful run replaces the event’s saved assignments with the generated result.
- An empty, blocked, or failed run leaves the saved schedule unchanged.
- Review each shift manually and fill any remaining gaps before you publish.
- Existing assignments are hints, not locks. To preserve them or set an event-wide hours cap, use an AI schedule proposal and review those constraints.
Troubleshooting
- Auto-Schedule is disabled or unavailable
- Open the event’s schedule as an organization admin or owner. Add shifts first; the button is disabled when there are no shifts or a save is in progress. If the event does not use scheduling, enable custom shifts in event management.
- The event cannot be rescheduled
- Check that it is in Draft. Recorded attendance and table reservations prevent replacement even in Draft. Keep those records intact and use the appropriate event management flow for further changes.
- There are no eligible people, or shifts remain unfilled
- Check the teams used by each shift requirement, approved memberships, shift capacities, team restrictions, and availability windows. Every automatic assignment needs a declared window that covers the full shift; membership in the organization alone is not enough. Review active rules for conflicting requirements, then inspect the roster after a run. A run can return no assignments when no eligible person fits.
- Auto-Schedule cannot create a complete schedule
- Review availability and active rules together. Correct contradictory requirements or add eligible team members before retrying. Check for overlapping assignments in other events if the returned message reports a conflict.
- The run times out or reports an error
- Read the error message and check the saved roster before retrying. A timeout or rejected result does not apply a generated replacement. For a temporary service error, try again later; contact support if it persists.
Connect the schedule to the event
Auto-Schedule handles the first pass. These guides cover the public signup page, the larger food-pantry example, and attendance after the roster is ready.
- Inspect supported rules and relationship constraints, including what “not on the same shift” means.
- Start with AI event setup when the event structure is still a plain-English request.
- See the two-week food pantry scheduling example with 20 approved volunteers and 42 shifts.
- Create a free volunteer signup page with roles, shifts, and a confirmed roster.
- Track volunteer attendance with QR codes after people choose their shifts.
Open your event and check its setup
Choose the organization and event you coordinate, then review its draft schedule, approved people, availability, and rules before running Auto-Schedule.
Open eventsComparing workflows? See the feature overview.